
Rice Paper Spanakopita: 7 Easy & Irresistible Secrets for Perfect Crispiness
Imagine the savory, herby, cheesy goodness of classic Greek spanakopita, but with a revolutionary twist that makes it lighter, crispier, and completely gluten-free. Welcome to the magic of Rice Paper Spanakopita! This modern take on a beloved Mediterranean staple swaps out delicate, time-consuming phyllo dough for simple rice paper sheets.
The result? An unbelievably crunchy, golden-brown exterior that shatters with every bite, revealing the warm, flavorful spinach and feta filling you know and love. It’s the perfect solution for anyone seeking a quicker, healthier, or gluten-free way to satisfy that spanakopita craving. Whether you’re a seasoned cook or a kitchen novice, this recipe is designed to be foolproof and incredibly rewarding.
Table of Contents
Why You’ll Love This Recipe
- Incredibly Easy: Forget the stress of working with fragile phyllo dough. Rice paper is forgiving, easy to find, and simple to handle. Just a quick dip in water and you’re ready to roll!
- Fantastically Crispy: When baked or air-fried, rice paper transforms into a glass-like, crispy shell that’s arguably even more satisfying than the original. It’s a texture you have to experience to believe.
- Healthier & Lighter: This version is naturally lighter than its phyllo-based cousin. We bake them instead of frying, and rice paper itself is a low-fat wrapper, making these a guilt-free indulgence.
- Naturally Gluten-Free: By using rice paper, this recipe is accessible to everyone, including those with gluten sensitivities or celiac disease. No special flours or complicated substitutions needed.
Quick View Recipe
- Prep Time:20 minutes
- Cook Time:20-25 minutes
- Total Time:45 minutes
- Servings:12-14 triangles
- Difficulty: Easy
Full Rice Paper Spanakopita Recipe
Ingredients
- 10 oz (280g) frozen chopped spinach, thawed and squeezed dry
- 6 oz (170g) feta cheese, crumbled
- 1/2 cup finely chopped yellow onion
- 2 cloves garlic, minced
- 1/4 cup chopped fresh dill
- 1/4 cup chopped fresh parsley
- 1 large egg, lightly beaten
- 1 tbsp lemon juice
- 1/2 tsp black pepper
- A pinch of nutmeg (optional)
- 12-14 round rice paper sheets
- 2 tbsp olive oil or melted butter, for brushing
Step-by-Step Instructions
- Prepare the Filling: The most crucial step for a non-soggy filling is to remove all excess water from the spinach. Place the thawed spinach in a clean kitchen towel or cheesecloth and squeeze firmly until no more liquid comes out. You should be left with a compact ball of spinach.
- Sauté Aromatics: In a small pan, heat a teaspoon of olive oil over medium heat. Add the finely chopped onion and cook until softened and translucent, about 4-5 minutes. Add the minced garlic and cook for another minute until fragrant. Remove from the heat and let it cool slightly.
- Combine Filling Ingredients: In a medium bowl, combine the dry spinach, crumbled feta, cooked onion and garlic, fresh dill, parsley, beaten egg, lemon juice, black pepper, and nutmeg (if using). Mix until everything is well incorporated.
- Set Up Your Wrapping Station: Fill a large, shallow dish (like a pie plate) with warm water. Have your rice paper sheets, the bowl of filling, and a clean cutting board or plate ready for folding. Line a baking sheet with parchment paper.
- Hydrate and Fill: Submerge one rice paper sheet in the warm water for about 15-20 seconds, just until it becomes pliable but not overly soft. Carefully lay it flat on your work surface. Place about 2 tablespoons of the spinach filling in a line on the bottom third of the wrapper.
- Fold the Triangles: Fold the bottom edge of the rice paper up over the filling. Fold in the left and right sides, creating a rectangular packet. Then, fold the packet up from the bottom in a triangular motion, like folding a flag, until you reach the end of the sheet. The moist rice paper will stick to itself.
- Bake to Golden Perfection: Place the folded triangles on the prepared baking sheet, leaving a little space between each one. Brush the tops and sides generously with olive oil or melted butter. This is key for getting them crispy! Bake in a preheated oven at 400°F (200°C) for 20-25 minutes, flipping halfway through, until they are deeply golden brown and crispy.
Tips for Extra Crispy Rice Paper
Want that signature shatter? Follow these pro tips:
- Don’t oversoak: Dip the rice paper just long enough for it to become flexible. If it gets too gummy, it will be hard to fold and may not crisp up as well.
- Try a Double Wrap: For a sturdier, even crunchier shell, use two sheets of rice paper together. Dip them simultaneously and treat them as a single layer.
- Be Generous with Oil: Don’t be shy when brushing the triangles with oil or melted butter. The fat is what helps the surface “fry” in the oven, creating that beautiful golden, bubbly crust.
- High Heat is Your Friend: Ensure your oven is fully preheated to 400°F (200°C). The initial blast of high heat helps the rice paper puff up and start crisping immediately.
- Give Them Space: Don’t overcrowd the baking sheet. Proper air circulation around each triangle is essential for even cooking and maximum crispiness.
Variations & Substitutions
Vegan Rice Paper Spanakopita
To make this recipe vegan, simply use a high-quality vegan feta alternative. For the binder, you can omit the egg or use a flax egg (1 tbsp ground flaxseed mixed with 3 tbsp water). Brush with olive oil instead of butter.
Air Fryer Method
The air fryer makes these even crispier! Preheat your air fryer to 375°F (190°C). Place the triangles in a single layer in the basket (you may need to work in batches). Air fry for 8-12 minutes, flipping halfway, until golden and super crispy.
Dairy-Free Option
Use your favorite dairy-free feta cheese. Many excellent almond or tofu-based options are available that crumble and taste just like the real thing.
How to Store & Reheat
Rice Paper Spanakopita is best enjoyed fresh for optimal crispiness. However, if you have leftovers, you can store them in an airtight container in the refrigerator for up to 3 days.
To reheat and bring back the crunch, avoid the microwave! Place them on a baking sheet and bake in the oven at 375°F (190°C) for 5-7 minutes, or pop them in the air fryer for 3-4 minutes until hot and crispy again.
Serving Suggestions
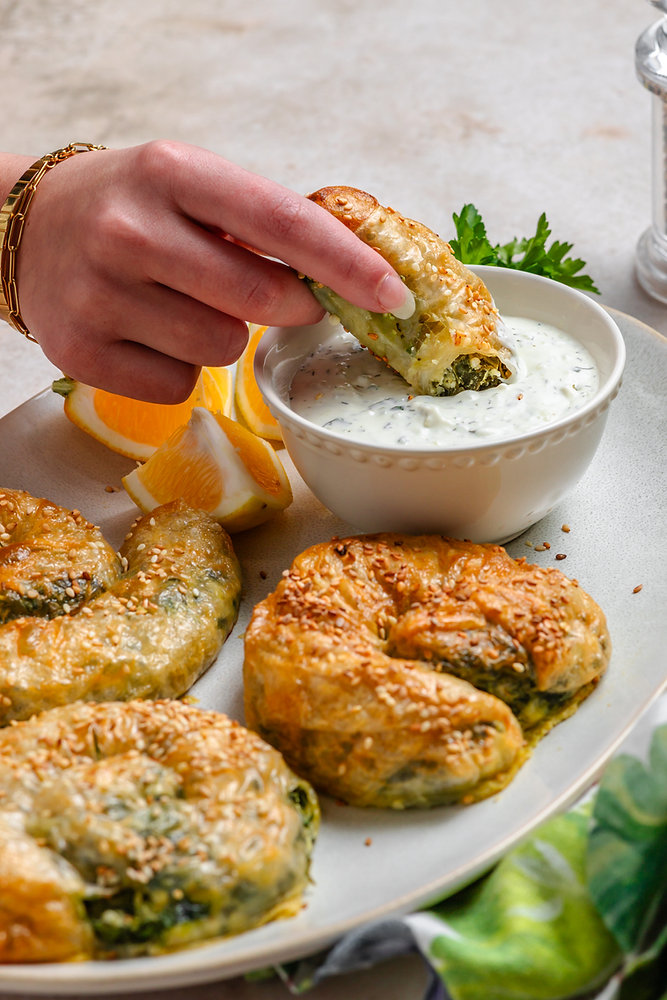
These crispy triangles are fantastic on their own, but they truly shine when paired with a cool, creamy dip. Serve them warm with:
- A side of classic Greek tzatziki sauce.
- A simple squeeze of fresh lemon juice.
- As part of a larger mezze platter with hummus, olives, and fresh vegetables.
- A spicy feta dip (Htipiti) for an extra kick.
Frequently Asked Questions
1. Can I make these ahead of time?
It’s best to bake them just before serving for the best texture. However, you can prepare the spinach and feta filling up to 2 days in advance and store it in an airtight container in the fridge. This makes assembly quick and easy when you’re ready to bake.
2. Why is my rice paper tearing when I fold it?
This usually happens for two reasons: oversoaking the paper, which makes it too delicate, or overfilling the triangle. Try soaking the paper for a shorter time (15 seconds is often enough) and use a little less filling (about 2 tablespoons) until you get the hang of it.
3. Is this Rice Paper Spanakopita recipe healthy?
Yes! Compared to the traditional version, it’s generally healthier. The rice paper wrapper is low in fat, and we bake it instead of deep-frying. The filling is packed with nutrient-rich spinach, making it a delicious way to get your greens in.
4. Can I use fresh spinach instead of frozen?
Absolutely. You will need about 1 pound (450g) of fresh spinach. Sauté it in a pan until fully wilted, then let it cool. Just like with frozen, it’s critical to squeeze out as much liquid as possible before adding it to the filling mixture.
Give It a Try!
Now that you have the secret to the crispiest, easiest, and gluten-free spanakopita, it’s time to get cooking! This Rice Paper Spanakopita is sure to become a new favorite appetizer or light meal in your home.
If you make this recipe, I’d love to hear about it! Leave a comment and a rating below, and don’t forget to tag @Seaclist on social media. Happy cooking!